Alistair Mason replaced the clutch assembly and dual mass flywheel on a 2012, 2.0 TDI Volkswagen Transporter T5 that had covered 134,000 miles. With a book time of 4.7 hours, full instruction available through Schaeffler’s REPXPERT workshop information website and only a small investment in workshop equipment, this is a profitable repair for any workshop.
Workshop equipment needed:
- Vehicle lift (two post is ideal)
- Engine support
- Clutch alignment tool
- Gearbox jack
Gearbox removal Open the bonnet and, for safety reasons, disconnect the negative battery lead and then remove the gear linkage cables from the gearbox.
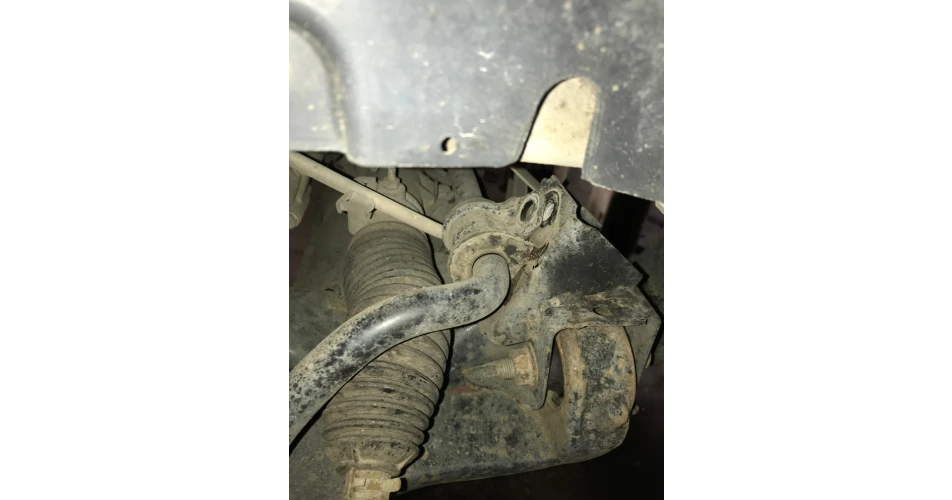
To remove the front sub-frame, raise the vehicle lift to waist height, remove both front wheels, disconnect the anti-roll bar from the front sub-frame (Fig 1), remove the steering rack retaining bolts from the front sub-frame and secure the steering rack in position. Disconnect both bottom ball joints from the hub carriers, remove the exhaust front pipe mounting from the sub-frame and disconnect the front and rear engine mountings. The sub-frame is now ready to be removed, so support the sub-frame with a gearbox jack, remove the sub-frame mounting bolts, lower the gearbox jack and remove the sub-frame.
Remove the inner driveshaft flange bolts on the N/S driveshaft, disconnect the driveshaft from the gearbox and secure the driveshaft away from the gearbox. On the O/S driveshaft, disconnect the centre bearing, pull the hub assembly out and disconnect the driveshaft. Remove the exhaust bracket that is above the O/S driveshaft, remove the rear bell housing bolts, as well as the starter motor and the front bell housing bolts, but leave one accessible to support the gearbox. Support the gearbox using a gearbox jack and support the engine using either a second gearbox jack, or suitable support system, and remove the gearbox mounting bolts, lowering the engine and gearbox slightly to aid removal.
On the top of the gearbox, remove the clutch slave cylinder retaining bolts and pipe bracket, then remove the gear linkage cable bracket and cables and the top bell housing bolts. Remove the final bolt, ease the gearbox away from the engine. When clear from the clutch, lower the gearbox and move it away from the vehicle.
Clutch replacement Remove the nine clutch cover bolts, then the cover, followed by the plate. The dual mass flywheel can then be tested for wear and in this instance, it was replaced following the customer’s request. Test information and specifications are available on Schaeffler’s REPXPERT website or on the REPXPERT app.
Check the back of the engine for any oil or coolant leaks that could contaminate the new clutch assembly and rectify if required. Always remove any clutch dust from the back of the engine using clutch and brake dust cleaner, and degrease the new flywheel at this point.
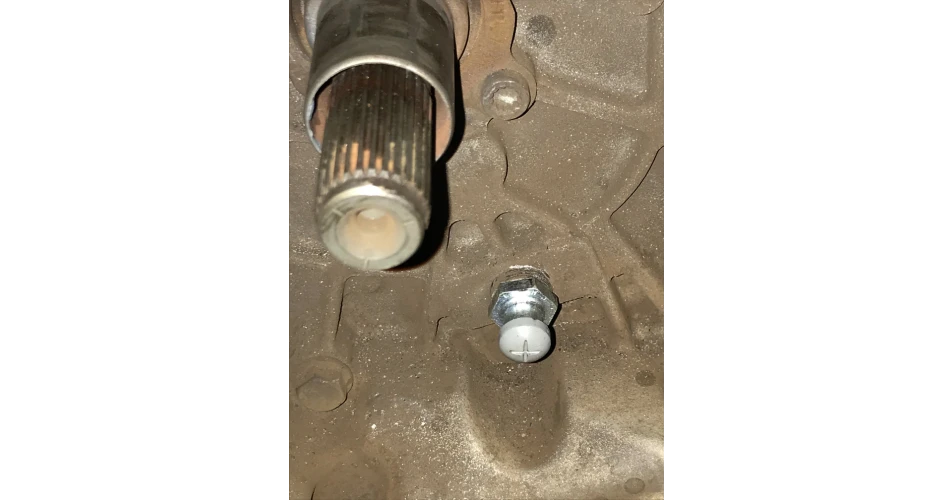
Attention now turns to the bell housing and clutch release system. Remove the release arm and bearing from the gearbox and remove the clutch dust from the bell housing using clutch and brake dust cleaner. Inspect the release bearing guide tube, release arm and also the release arm pivot point for any wear and replace if required. In this instance, wear was noticed on the pivot point and this was therefore replaced accordingly (Fig 2).
Re-fit the release arm with the new release bearing attached, applying a light smear of high melting point grease to the pivot points. The release bearing does not require any lubrication, as it is nylon running on metal.
Apply a light smear of high melting point grease to the input shaft splines and mount the clutch plate, this will evenly distribute the grease and confirm correct fitment, then remove the clutch plate and wipe off any excess grease.
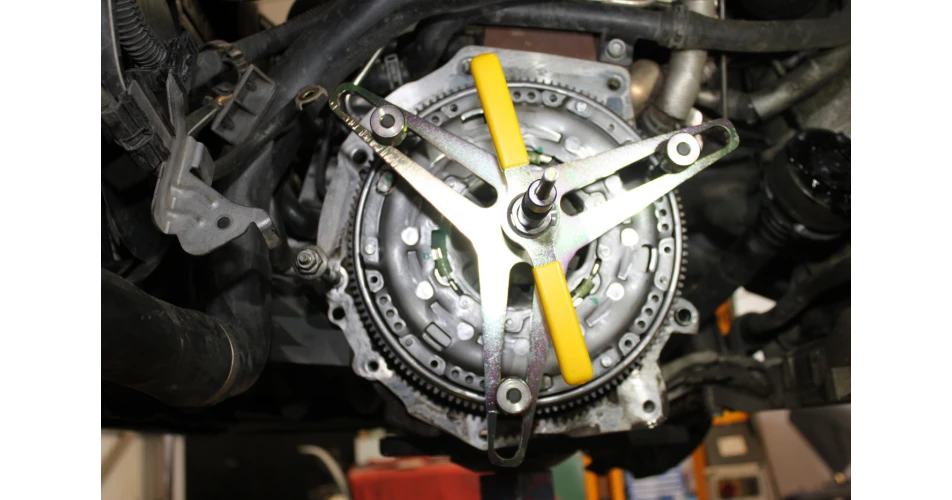
As this is a self-adjusting clutch, identified by the three small yellow springs in the clutch cover, it is strongly advised that a self-adjusting clutch tool is used to mount the clutch. First, align the clutch plate using the clutch alignment tool and position the clutch cover/pressure plate on the alignment dowels. Mount the self-adjusting clutch tool and then ease the clutch into the home position (Fig 3), insert the six clutch bolts and tighten. Remove the tool and fit the remaining three clutch bolts and tighten, then, torque the clutch bolts to the manufacturer’s specification.
Gearbox installation With the clutch replaced, check that the gearbox alignment dowels are positioned correctly in the engine block and that all components and wiring are clear of the bell-housing area, so not to interfere with the gearbox installation. Position the gearbox on the gearbox jack, ease onto the clutch and then onto the alignment dowels. When the gearbox is in position, secure with two easily accessible bell housing bolts.
Installation is in reverse order of removal, but remember to torque all bolts to the manufacturer’s specifications where stated, and reset electrical units where required. Finally, on completion of the job, always carry out a full road test to confirm a quality repair.
Information on Schaeffler products, fitting instructions, labour times and much more can be found on the REPXPERT garage portal – www.repxpert.co.uk – the REPXPERT app, or by calling the Schaeffler REPXPERT hotline on (+44) 1432 264264.
To read more of this technical article or download the entire article click
here. There are lots more Tech Tips to view, and they are all searchable, on
TechTips.ie.


-1-copy.jpg)