REPXPERT Alistair Mason is replacing the clutch and dual mass flywheel in a 2011 BMW 1-Series, fitted with a 2.0 turbo diesel engine that has covered over 120,000 miles. The 1-Series is a great all-rounder and very popular, so with a repair time of 4.2 hours and only limited workshop equipment required, it presents a good clutch replacement opportunity for the independent workshop.
Workshop Equipment Required • Vehicle lift (two-post is ideal)
• Transmission jack
• Clutch alignment tool
Gearbox Removal With this repair, all the work is carried out from the underside, so raise the vehicle lift to gain good access and remove the engine and gearbox under shield and disconnect the rear exhaust mounts to allow the exhaust to be stowed to the O/S giving better access to the prop shaft.
Mark the prop shaft mounting points to eliminate any balance issues (
Fig. 1) and then disconnect it from the gearbox flange and position it above. Support the gearbox with a transmission jack, remove the rear gearbox mounting assembly and then disconnect the gearchange linkages by releasing and removing the retaining clips (
Fig. 2).
Disconnect the reverse light switch and unclip the wiring loom from the gearbox. Remove the two nuts that secure the clutch slave cylinder on the other side of the gearbox, detach the slave cylinder assembly (
Fig. 3), and stow it away from the bellhousing area. There is also a sensor on the top of the gearbox which requires the multiplug being disconnected.
Work around the bellhousing, removing the bellhousing bolts and exhaust bracket. Leave one easily accessible bolt to secure the gearbox. Ensure the transmission jack is in a central position supporting the gearbox, then remove the final bell housing bolt and ease the gearbox away from the engine. Once clear, lower the gearbox and stow the gearbox safely.
With this vehicle, it was evident that the self-adjusting clutch had reached the end of its service life, indicated by the fact that the three yellow adjuster springs were fully extended and were at the end of their travel.
Clutch & Dual Mass Flywheel Replacement Remove the six clutch retaining bolts, the clutch pressure plate assembly and then the clutch plate. In this repair the dual mass flywheel was also being replaced, but if this was not the case, now is the time to test the rotational free play and bearing rock of the dual mass flywheel with its values and instructions being easily obtained from the REPXPERT app.
Remove the eight flywheel bolts and the flywheel. Check for any oil or coolant leaks that could contaminate the new clutch and flywheel assembly and rectify if required.
Mount the new dual mass flywheel onto the crankshaft ensuring the flywheel locates onto the dowel correctly (
Fig. 4). Insert the new flywheel bolts and torque to the manufacturer’s specification. De-grease the flywheel face using clutch and brake dust cleaner.
Attention now turns to the gearbox and the release system, so remove the clutch release bearing and release arm, inspect the ball pivot and release bearing guide tube for any wear and replace if required. Clean the bell housing using clutch and brake dust cleaner. Mount the new release bearing and release arm, ensuring the release bearing is positioned correctly, a process that is explained by a non-verbal bulletin that is supplied with the replacement clutch.
Apply a light smear of high melting point grease to the gearbox input splines and then place the clutch plate onto the input shaft, this will ensure the clutch plate has the correct fitment and evenly distributes the grease. Then remove the clutch plate, and wipe off any excess grease.
Mount the clutch plate onto the flywheel. This is where this clutch differs from a conventional set up, as the flywheel has a solid spigot, which means a special tool/spacer bush is required to align the clutch plate. Mount the spacer bush onto the spigot (
Fig. 5), then mount the clutch plate onto the spacer bush ensuring the words “Gearbox side” or “Getribeseite” are facing away from the engine (
Fig.6).
De-grease the clutch pressure plate clutch face and then locate it onto the alignment dowels and insert the clutch bolts, and tighten in an even and sequential sequence and finally torque to the manufacturer’s specification.
Now remove the transport locking plate from the centre of the clutch using a 14mm Allen key and rotate in an anti-clockwise direction (
Fig. 7). Once the key is removed, the clutch plate aligning tool/spacer bush can also be removed with the aid of a small bolt (
Fig. 8).
Gearbox Installation Prior to gearbox installation, ensure all cables and pipes are clear so they don’t get trapped when the gearbox is installed and that the gearbox alignment dowels are installed in the engine. Using a transmission jack, ease the gearbox into position and when the gearbox has located on the dowels, install, and tighten an easily accessible bolt.
Installation is in reverse order of removal, but always check if the bellhousing bolts need replacing using the manufacturer’s information, and always torque bolts to the specification it states.
Information on Schaeffler products, fitting instructions, labour times and much more can be found on the REPXPERT workshop portal - www.repxpert.co.uk - the REPXPERT app, or by calling the Schaeffler REPXPERT hotline on (+44) 1432 265 265.
To read more of this technical article or download the entire article click
here. There are lots more Tech Tips to view, and they are all searchable, on
TechTips.ie.
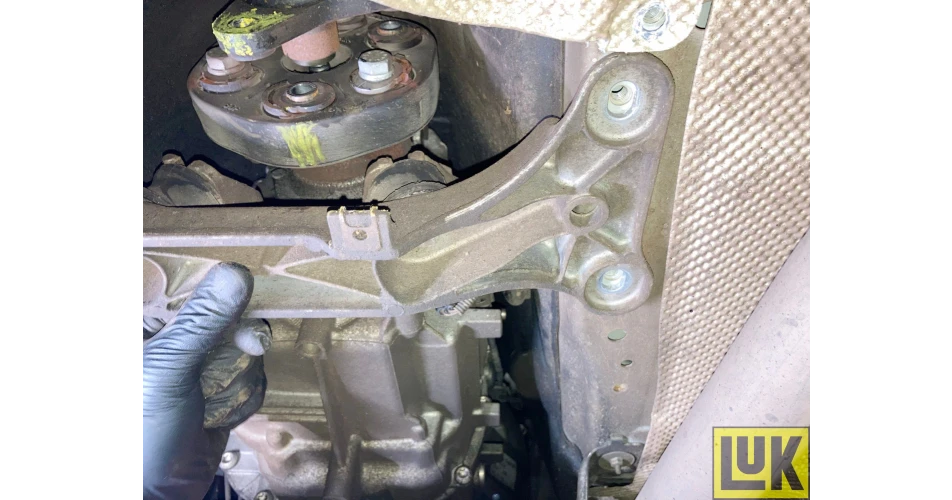 Fig. 1
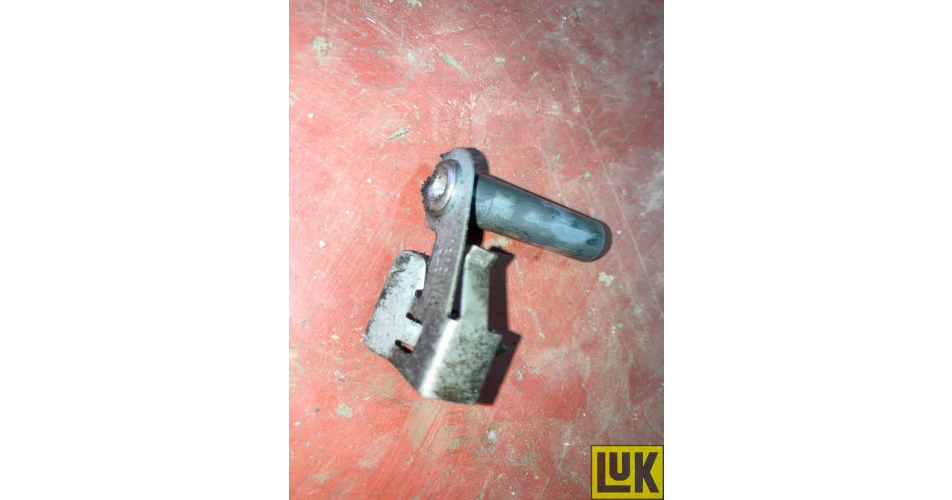 Fig. 2
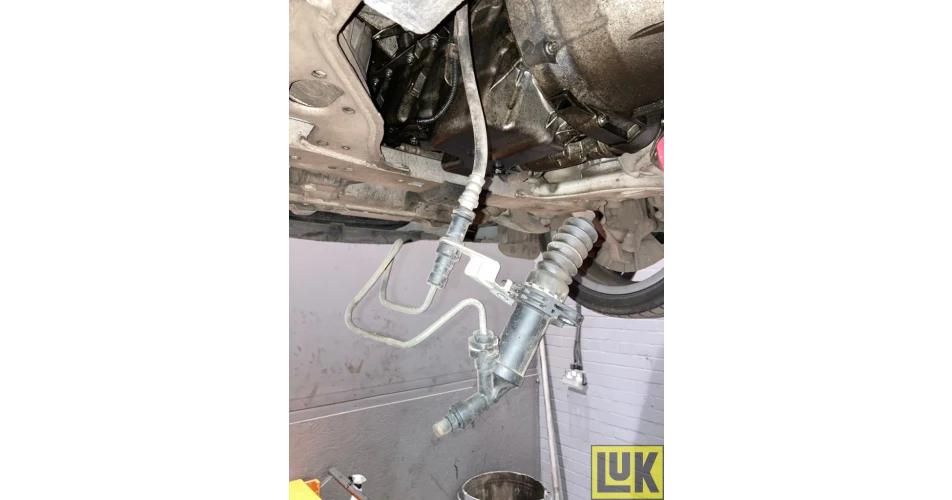 Fig. 3
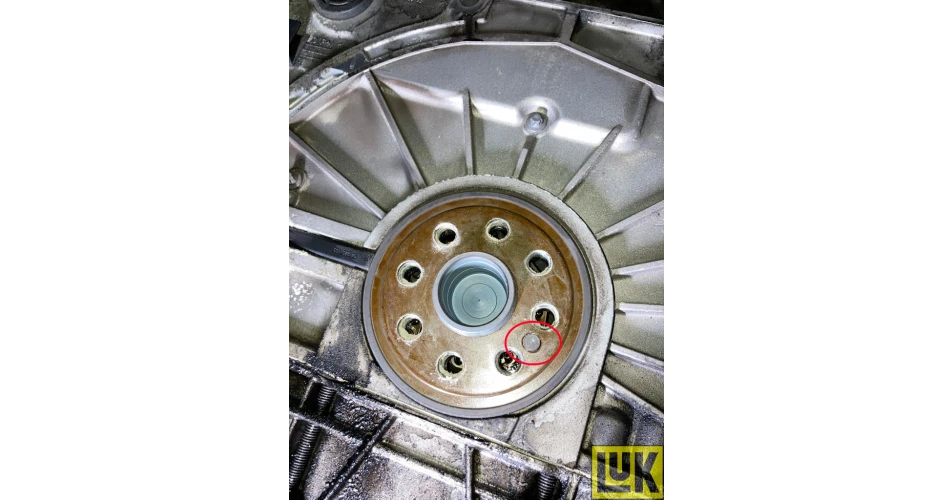 Fig. 4
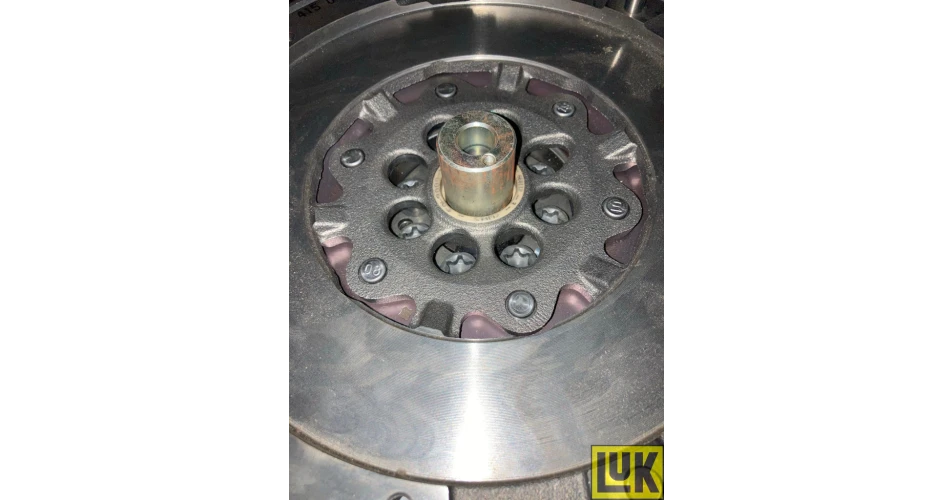 Fig. 5
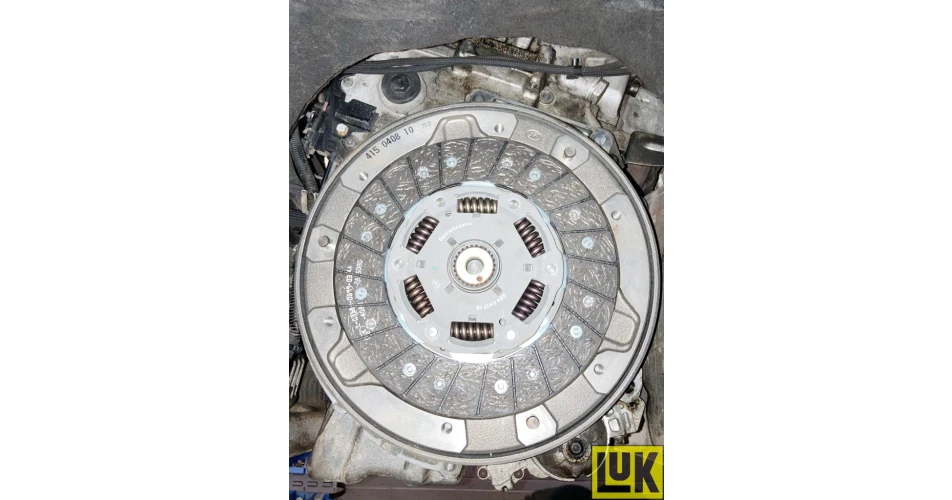 Fig. 6
 Fig. 7
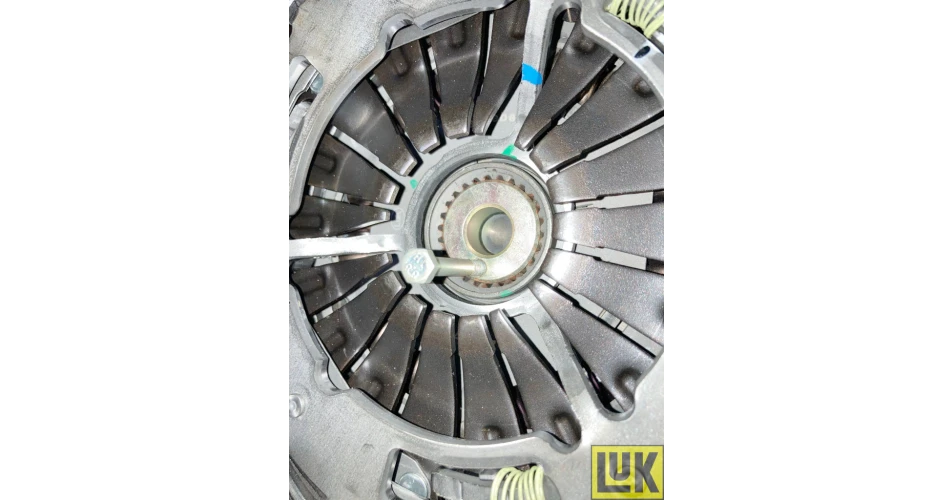 Fig. 8


-1.jpg)