REPXPERT Alistair Mason is focusing on best practice clutch replacement to ensure an efficient and quality repair, using a front wheel drive 2012 Ford Transit fitted with a 2.2 TDCi engine as an example. Noticeably, there are more vans on the roads these days, as delivery businesses are booming.
The key to these repairs is to carry out a fast and efficient repair, whilst eliminating any repeat repairs that will cause more down time of the vehicle.
The vehicle was diagnosed with a worn clutch due to slight ‘clutch slip’ and the customer was also advised that it would be good practice to replace the dual mass flywheel (DMF), as the vehicle had covered more than 113,000 miles, and usually transported heavy loads.
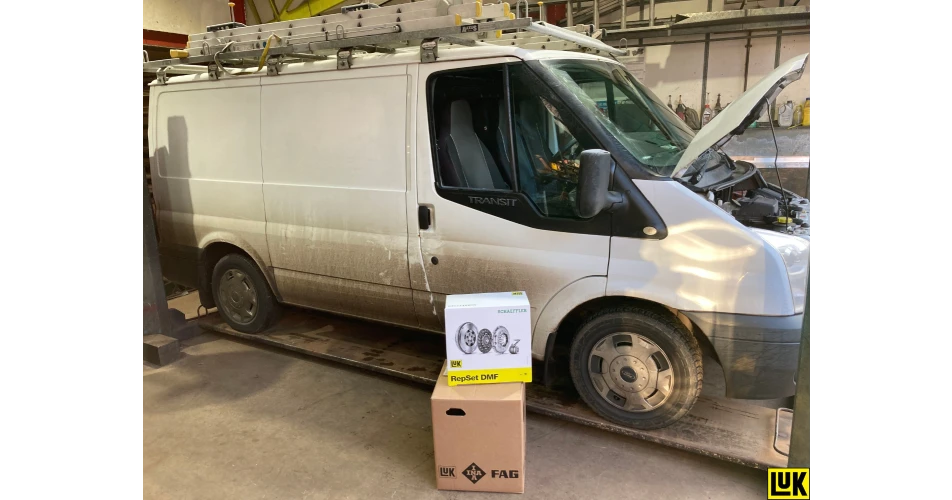
A Schaeffler LuK RepSet DMF kit was ordered for the vehicle, as this contains all components required to replace the clutch and DMF, and both are designed and manufactured to work perfectly together. It is therefore strongly recommended not to mix and match different brands in one system.
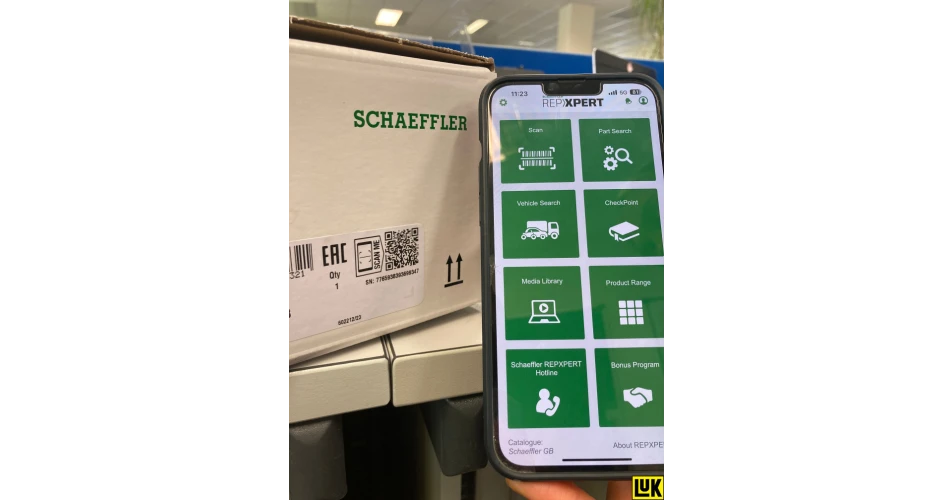
Prior to starting the repair, the QR code was scanned on the side of the box (Fig 1) using Schaeffler’s REPXPERT app, and the technical documents were checked, to find any service information or bulletins that were critical to the repair. A 30 second scan for information could easily save hours, should a service instruction be overlooked, for example. So, with all the parts and information available, repair instructions and torque values printed off, it’s time to carry out the repair.
The advised workshop equipment:
- Vehicle lift, two post or wheel free is ideal
- Transmission jack
- Engine support
- Self-adjusting clutch tool
- Waste oil drain system
- Clutch bleeding tool, a vacuum bleeder is recommended
With the vehicle positioned on the lift, it’s best practice to connect a ‘back up’ battery to retain the radio code, then disconnect the negative battery lead located under the driver’s seat. Open the bonnet, remove the engine cover, air filter/box assembly (allowing good access to remove the gear cables), upper section of the gearbox mounting, electrical multiplugs and upper bell housing bolts, then clamp the flexible section of the hydraulic clutch pipe and disconnect the pipe from the concentric slave cylinder (CSC).
With the vehicle still on the ground, slacken both front hub nuts, raise the lift to access the underside, drain the gearbox oil and, whilst the oil is draining, remove both front wheels. Release both bottom ball joints, remove the hub nuts, release the O/S driveshaft support bearing, remove the outer CV joints from the hubs and then both front driveshafts.
Remove the lower gearbox mounting, starter motor, electrical multiplugs and bell housing bolts, but leave two easily accessible bolts to support the gearbox, until it is ready to be removed.
Lower the lift, and support the engine with an engine brace, and remove the gearbox mounting. Lower the engine slightly on the engine brace, as this will aid gearbox removal. Raise the vehicle lift to access the underside, support the gearbox with a transmission jack, remove the final two bell housing bolts and ease the gearbox away from the engine. When the gearbox input shaft is clear of the clutch, lower the transmission jack and remove the gearbox from the vehicle.
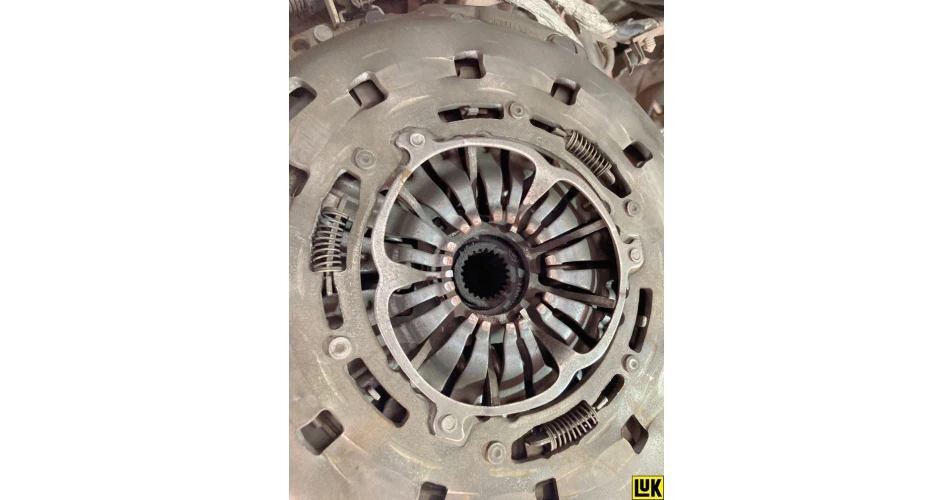
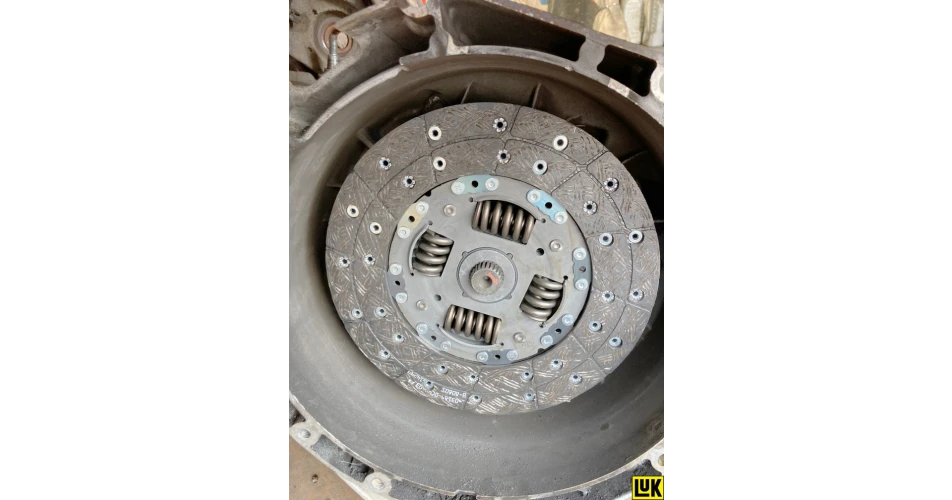
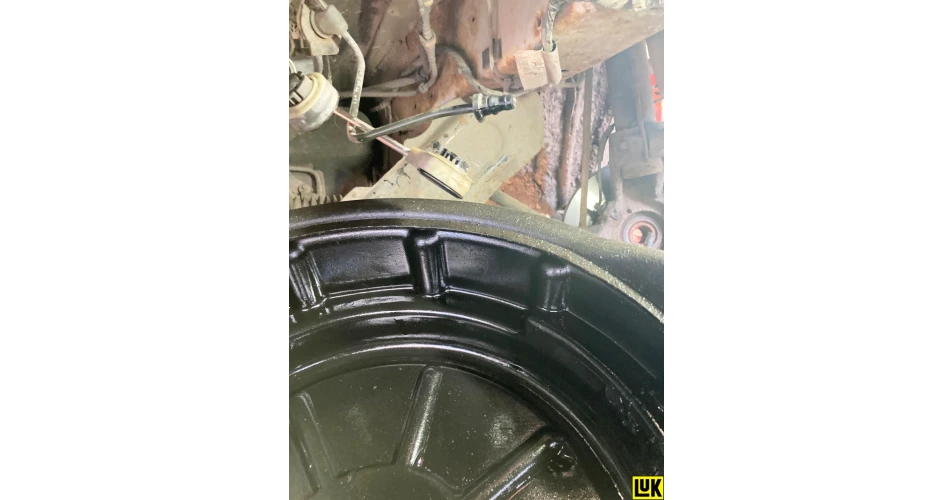
With the gearbox removed, a good indication of whether the clutch is at the end of its service life is if the three small, yellow adjusting springs have extended (Fig 2). Remove the six clutch assembly bolts, ease the clutch cover off the dowels and then remove the clutch assembly, noting which way round the clutch plate is as it is useful to refer back to.
Remove the DMF by detaching the eight flywheel bolts. In this case, slight ‘blueing’ was noticed on the flywheel surface, which would indicate heat generated from clutch slip, and was another good reason to replace the DMF, as this heat will affect the internal grease and arc springs and compromise the DMF’s performance. If required, the DMF can be tested for rotational free play and rock, full instructions and specifications for which are available on REPXPERT. With the flywheel removed, check the back of the engine for any oil or coolant leaks, rectify as required and then clean the back of the engine with clutch and brake dust cleaner.
Turning attention to the gearbox and the release system, remove the CSC, check the gearbox for any leaks and rectify if required. Clean the bell housing and input shaft area to prevent the old clutch dust from contaminating the new clutch and DMF.
The CSC must always be replaced when replacing a clutch, as the guide tube can become dirty, corroded and pitted, and therefore damage the hydraulic seal when removing the gearbox.
Remembering to never squeeze the new CSC, as this can cause damage to the new unit. Fit the new CSC supplied with the RepSet DMF kit, but ensure the seating area for the CSC is clean. Then mount the CSC squarely and ensure that all the bolts are tightened correctly.
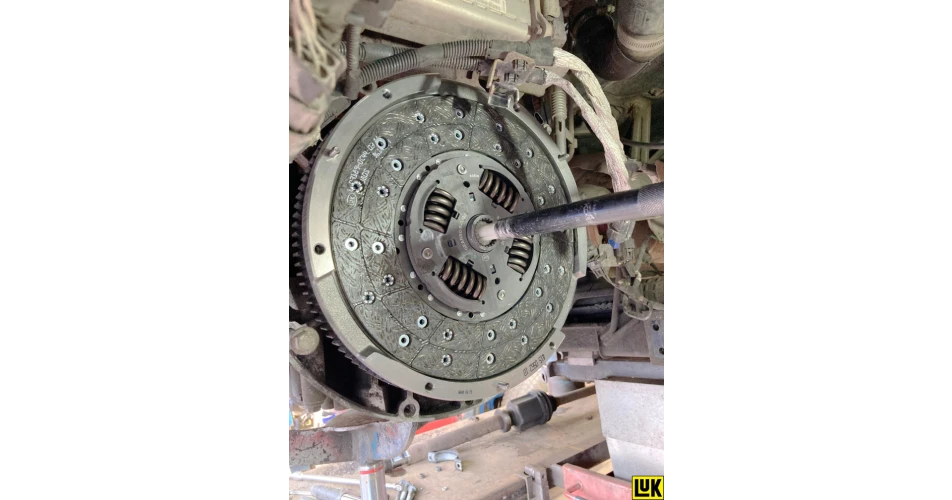
Apply a light smear of high melting point grease to the gearbox input shaft, and mount the new clutch plate onto the input shaft (Fig 3). This will ensure that the clutch plate is the correct fitment and also evenly distribute the grease. Remove the clutch plate and wipe off any excess grease.
Going back to the clutch and DMF, ensuring that it is located correctly, mount the new DMF on the engine, insert the new bolts and torque them to the manufacturer’s specification, which can be found easily on REPXPERT. Make sure the DMF face is clean and grease free using clutch and brake dust cleaner.
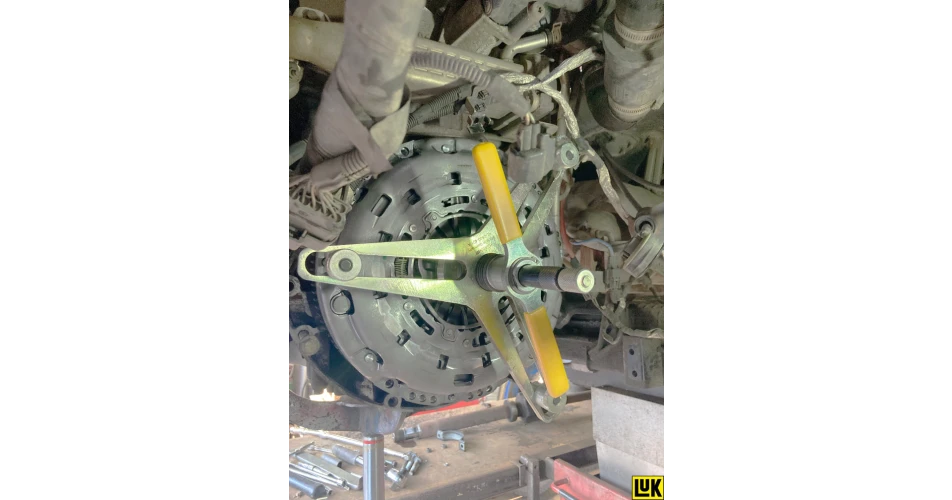
When fitting a self-adjusting clutch, it is strongly recommended to use a self-adjusting clutch mounting tool, as otherwise there is a risk that the clutch could adjust, the cover twist or even strip threads in the new DMF.
Using the self-adjusting clutch tool, mount the clutch plate in position using the clutch alignment tool (Fig 2) ensuring the plate is facing the correct way (gearbox side facing away from the engine). Clean and degrease the clutch pressure plate, mount the clutch pressure plate onto the dowels of the flywheel, fit the self-adjusting clutch tool (Fig 3) and then ease the clutch pressure plate into position. Insert half of the clutch bolts and ‘nip up’, then remove the tool, insert the remaining bolts and torque to the manufacturer’s torque value.
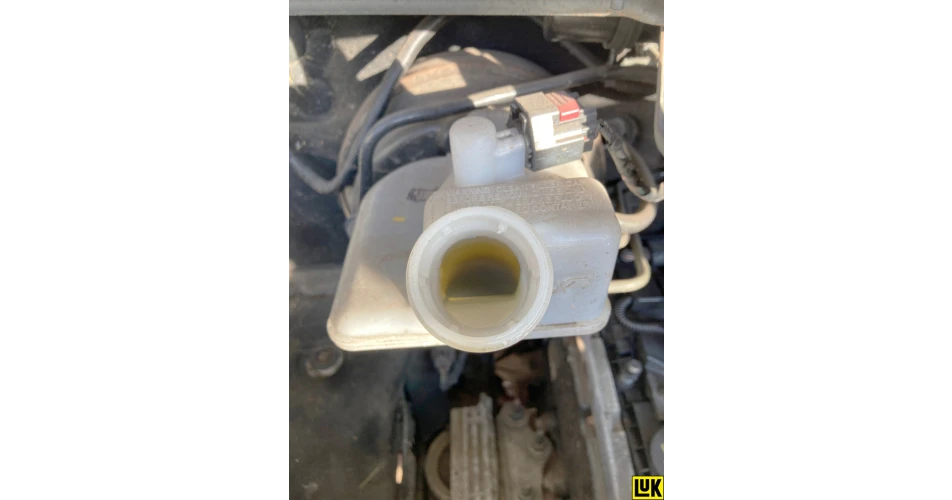
Before refitting the gearbox, an important part of the job that often gets overlooked, is to drain, flush and replace the clutch fluid. This is because the fluid is usually old, brown in colour and is contaminated with moisture. This in turn, will contaminate the new CSC seal and potentially cause a failure a short time after the repair.
Simply release the clamp on the hydraulic clutch pipe, allow the old fluid to drain out, refill the reservoir with the correct specification of new fluid, allow that to flush through the system, re-clamp the hydraulic clutch pipe, and refill the reservoir.
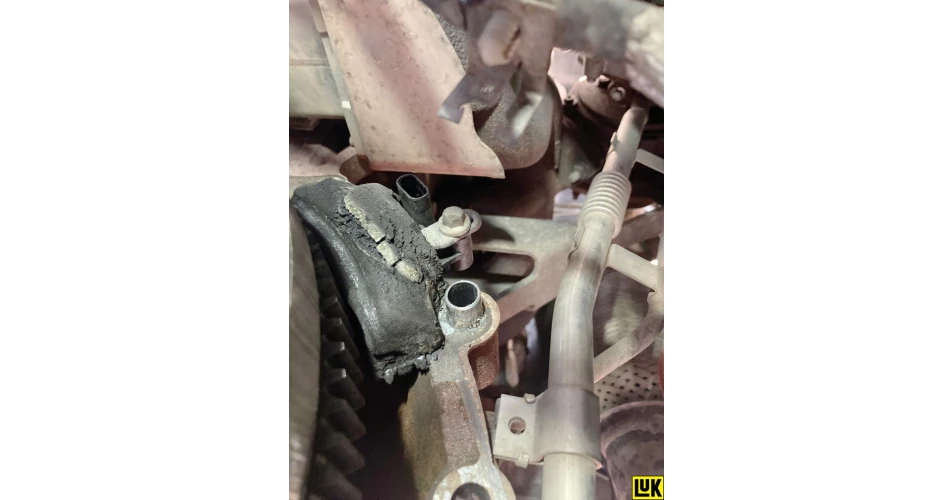
Finally, ensure the gearbox to engine alignment dowels are installed correctly (Fig 4) and all cables, etc, are clear of the bell housing area, so that they don’t get trapped as the gearbox is being installed.
Using the transmission jack, ease the gearbox into position, taking time to confirm the alignment is correct. Once the gearbox is mounted onto the alignment dowels, insert and tighten the accessible bell housing bolts.
Installation is in reverse order of removal, but remember to replenish the gearbox oil.
When bleeding the clutch, the best method is to gravity bleed it by simply opening the bleed nipple, with a clear pipe connected, and allowing the air and fluid to drain into a container. When all the air has bled out, the nipple can then be retightened, but in the real world, the bleeding process generally needs some assistance to remove all of the air. This is why using a vacuum bleeder is best, as it draws the fluid and air out, without any risk to the hydraulic system.
If the only option is to manually bleed the clutch, use a second person operating the clutch pedal in a steady manner, and always allow the system to stabilise before pressing the pedal again, as this can easily over pressurise the system and damage the new CSC.
After connecting the battery, reset all relevant electrical systems where required, and carry out a full road test to confirm a quality repair has been completed.
Information on Schaeffler products and systems, fitting instructions, labour times and much more can be found on the REPXPERT app, downloadable for free for all iOS and Android devices, or at www.repxpert.co.uk. Alternatively, for live help from one of our technical team, call the REPXPERT hotline on (+44) 1432 265 265.
To read more of this technical article or download the entire article click
here. There are lots more Tech Tips to view, and they are all searchable, on
TechTips.ie.


---Elena-Wrelton-with-Robbie-Sweeney-holding-an-EV-part-removed-during-ELVES-Electric-Loops-dismantling-of-an-EV-to-assess-and-record-its-component-parts.jpg)