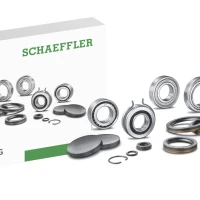
REPXPERT Alistair Mason is replacing the clutch and dual mass flywheel in a 2016 Renault Traffic van fitted with a 1.6 dCi engine that has covered more than 110,000 miles. The Renault Traffic is now in its third generation and, although a 1.6 dCI engine may sound a little underpowered for a van of this size, adequate power is achieved by using a variable geometry turbocharger. There are a couple of interesting points with this clutch and flywheel replacement that will be highlighted during the article. Full repair instructions are available on Schaeffler’s REPXPERT information portal and the scheduled time for this repair is 7.5 hours.
Workshop equipment required:
• Vehicle lift, (2 post is ideal)
• Engine support
• Transmission jack
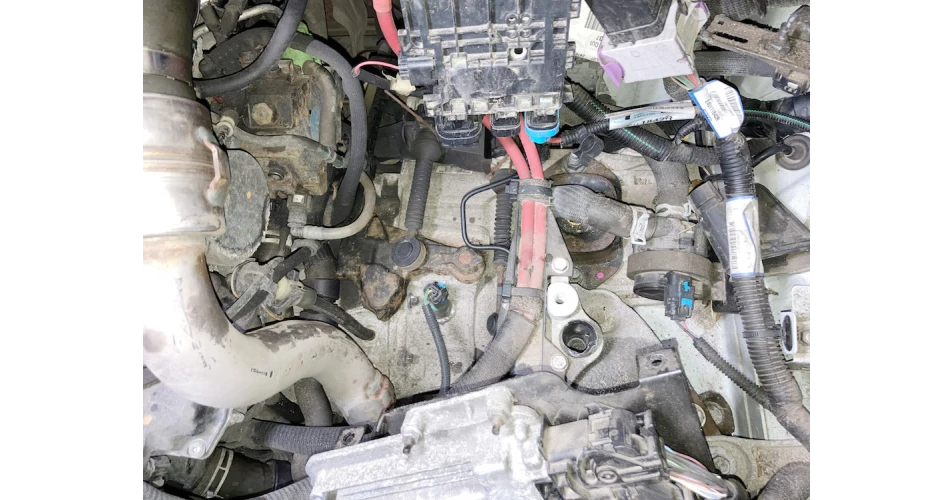
Gearbox removal With the vehicle at ground level placed on the lift, slacken both front wheels and the hub nuts, open the bonnet and remove the battery and battery tray. This provides access to the top of the gearbox, where the gear cables can be disconnected by levering them off the ball joints and the reverse light switch removed.
Raise the ramp to waist height, remove the front wheels, hub nuts, n/s wheel arch liner and then unbolt the gearbox earth strap. Take off the front subframe by firstly removing the engine undertray, then disconnect both bottom ball joints and then the anti-roll bar clamps from the subframe. Support the weight of the steering rack by securing it to the front suspension springs and remove the two steering rack nuts that hold the rack to the subframe, then the engine pendulum mounting. Take the weight of the subframe with a transmission jack, remove the four subframe bolts, lower the subframe and remove it from the vehicle.
Drain the gearbox oil and then remove both driveshafts by levering them out of the gearbox, releasing the centre bearing on the o/s driveshaft from its bracket.
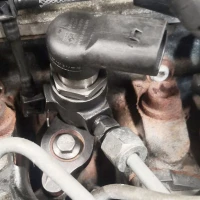
With the front subframe and driveshafts out of the way, it gives good access to the lower bellhousing bolts. Work around the bellhousing removing the bolts and attached brackets, but leave a couple of easily accessible bolts to support the gearbox, which can be removed later. Disconnect the engine speed sensor.
Lower the vehicle lift, attach a suitable engine support, disconnect the hydraulic clutch pipe from the concentric slave cylinder (CSC) connection at the bellhousing, remove the upper bellhousing bolts and brackets as required and remove the gearbox mounting.
Access the underside of the vehicle, support the gearbox with a transmission jack, remove the final bellhousing bolts and ease the gearbox off the engine; once clear, lower the transmission jack and take the gearbox away from the vehicle
Clutch/dual mass flywheel replacement Remove the six clutch bolts, the clutch assembly, the eight dual mass flywheel (DMF) bolts and then the DMF, inspecting the back of the engine for any oil or coolant leaks and rectify if required.
Note – When replacing the DMF, it must be bolted in the correct position otherwise the vehicle will not start due to the reference point on the reluctor ring being in the incorrect position. This is determined by aligning a drilling in the crankshaft and an additional hole in the DMF. However, there is also a bulletin in the replacement LuK DMF box, explaining the procedure.
Once in position, insert the new DMF bolts, tighten and torque to the values found on the REPXPERT app and in the REPXPERT fitting instructions. Finally, clean the flywheel face using brake and clutch dust cleaner.
Remove the clutch pipe retaining clip then the pipe, followed by the two CSC retaining bolts and the CSC. Check the gearbox input shaft seal is in good condition and then clean the bellhousing, removing the old clutch dust, so not to contaminate the new clutch. Also, ensure the two CSC retaining bolt holes are clean and free from thread lock, as this can cause incorrect bolt torque.
Note – The new CSC is supplied with three clutch pipes to cover different applications, but the bulletin in the box will indicate the clutch pipe to be used, which can be confirmed by offering it up to the old unit.
Mount the new CSC, but don’t yet tighten the two retaining bolts. Insert the new clutch pipe through the bellhousing and clip it into the CSC. The final operation is to tighten and torque the CSC retaining bolts.
Apply a light smear of high melting point grease to the gearbox input shaft splines, mount the new clutch plate on the input shaft and move it back and forth, which will ensure the clutch plate is correct and also evenly distribute the grease. Remove the clutch plate and wipe off any excess grease.
Mount the new clutch assembly onto the DMF, but ensure the “Gearbox side” etched into the centre of the clutch plate is facing away from the engine. Using a clutch alignment tool, mount the clutch plate onto the flywheel, degrease the clutch pressure plate surface and align the pressure plate onto the flywheel dowels. Insert the clutch bolts and tighten in an even and sequential manner or by using Schaeffler’s SAC tool. Finally, torque the clutch bolts to the manufacturer’s specification.
To avoid any contamination of the new CSC, before refitting the gearbox it is advised practice to drain the old clutch fluid out of the system and replenish it with new.
Check the two gearbox alignment dowels are still situated in the engine block and that all cables and brackets are clear and ready for gearbox installation.
Gearbox installation Using the transmission jack, ease the gearbox into position, taking time to align the input shaft, and once installed and aligned on the dowels, insert a couple of easily accessible bellhousing bolts and tighten.
Installation is in reverse order of removal. Tighten all required bolts to the manufacturer’s torque values. It is recommended to vacuum bleed the clutch. After the battery has been reconnected, reset electrical consumers such as the radio, clock, electric windows etc. as required.
Information on Schaeffler products, fitting instructions, labour times and much more can be found on the REPXPERT workshop portal - www.repxpert.co.uk - the REPXPERT app, or by calling the Schaeffler REPXPERT hotline on (+44) 1432 265 265.
To read more of this technical article or download the entire article click
here. There are lots more Tech Tips to view, and they are all searchable, on
TechTips.ie.