Tesla drivers all over the world reported annoying squeaking sounds in Model 3 and Model Y vehicles, so MEYLE engineers analysed the problem. After intensive development work, MEYLE HD designed an improved control arm for these models, which is now available to the aftermarket. These instructions will guide you through the entire job.
Step 1: Remove the wheel and inner wheel arch. Remove all clips and the screws located under the wing.
Step 2: Check all the other suspension parts for damage and general condition. Release the ABS wire where it is attached the control arm.
Step 3: Remove the frunk, by first removing the circuit breaker, and then the screws and clips.
Step 4: Remove control arm top mount fixings, located in the frunk. The drain that allowed water to contaminate the original control arm is next to the mounts.
Step 5: Remove ball joint and control arm fixings. Pull the control arm out of the top mount.
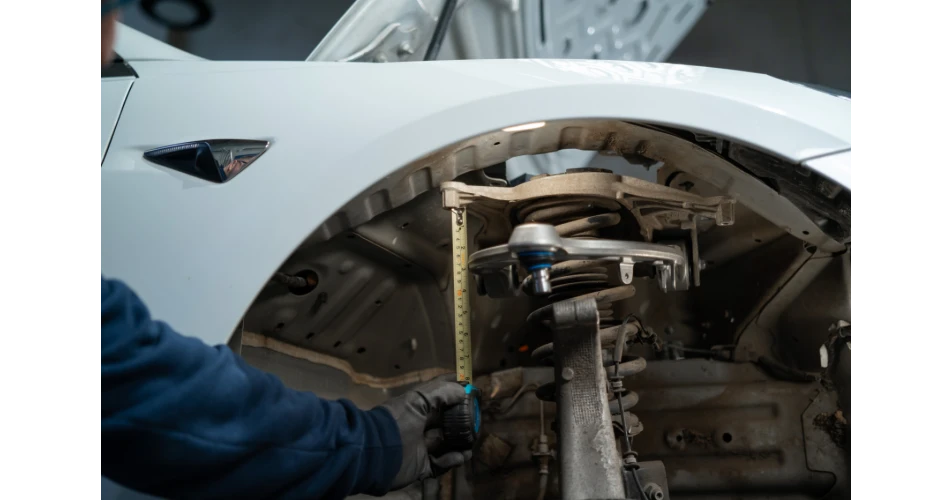
Step 6: Push the new MEYLE HD control arm into the top mount. Adjustment between the arm and the top mount should be 60mm.
Step 7: Push the ball joint in the swivel bearing
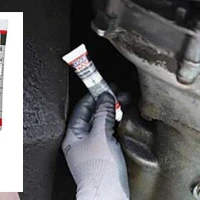
Step 8: Tighten all fixings to manufacturer recommended settings:
- Ball joint screw – 56Nm
- Bearing control arm – 50Nm
- Top mount 13mm screw – 35Nm
- Top mount 15mm screw – 62Nm
Re-attach the ABS cable to the control arm.
A wheel alignment is recommended. MEYLE advises to change both control arms and offers a kit that comes with the correct fittings to get the job done as quickly as possible. An experienced mechanic will probably need only one hour per side to complete this job.
For more information visit MEYLE’s website at meyle.com/en.
To read more of this technical article or download the entire article click
here. There are lots more Tech Tips to view, and they are all searchable, on
TechTips.ie.
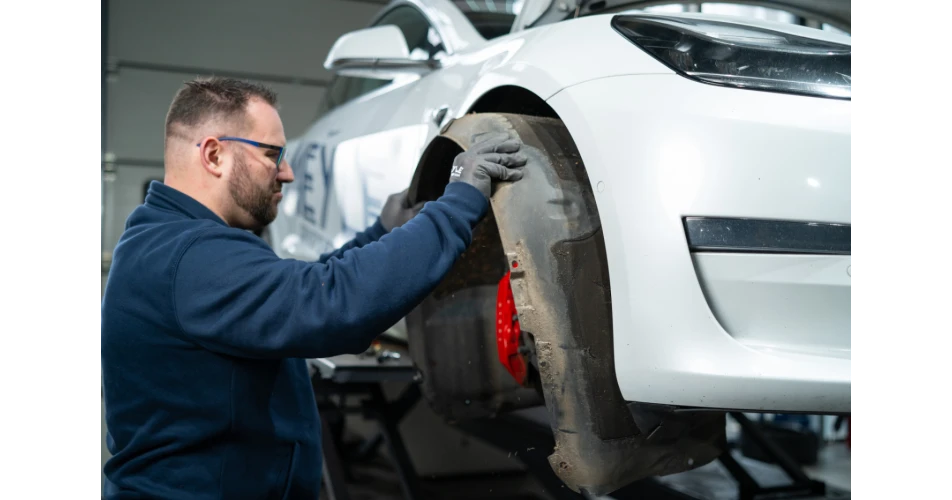 Remove the wheel and inner wheel arch. Remove all clips and the screws located under the wing.
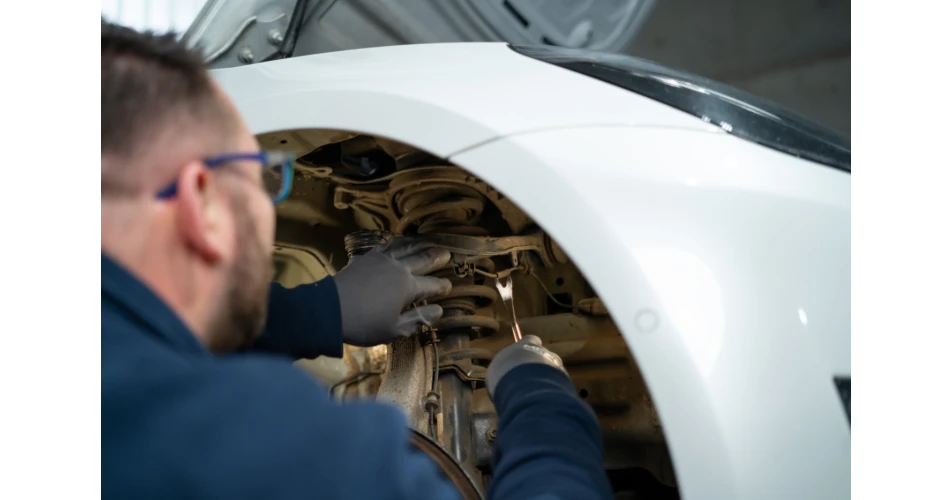 Check all the other suspension parts for damage and general condition. Release the ABS wire where it is attached the control arm.
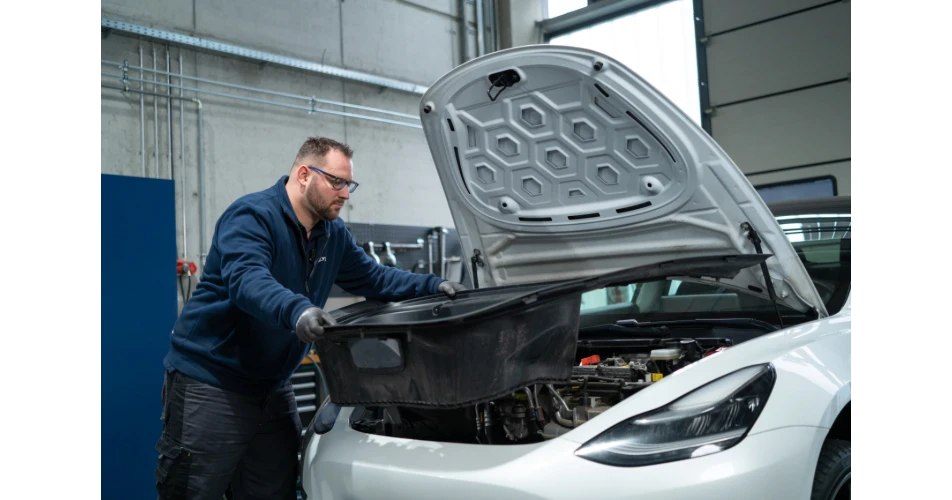 Remove the frunk, by first removing the circuit breaker, and then the screws and clips.
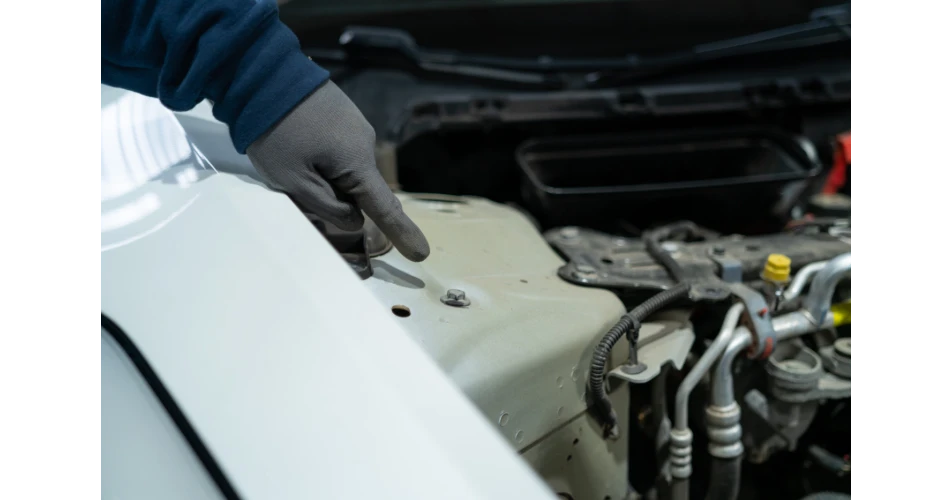 Remove control arm top mount fixings, located in the frunk. The drain that allowed water to contaminate the original control arm is next to the mounts.
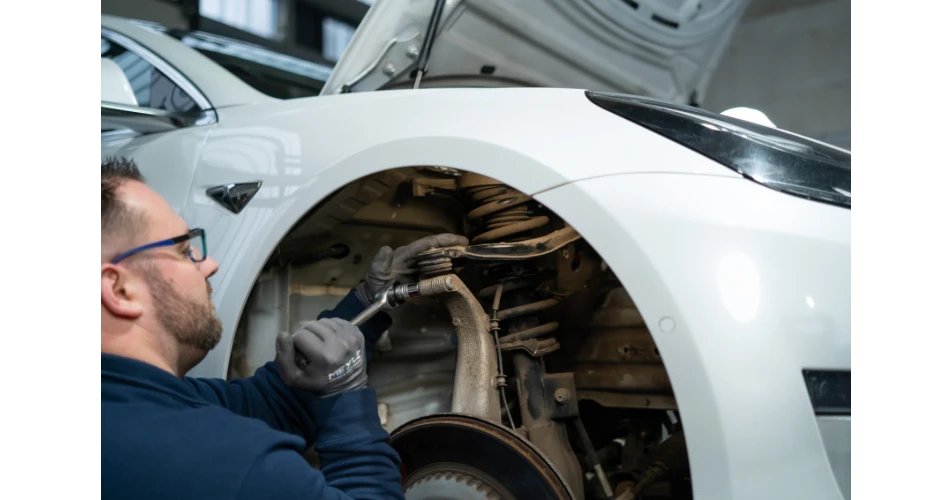 Remove ball joint and control arm fixings. Pull the control arm out of the top mount.
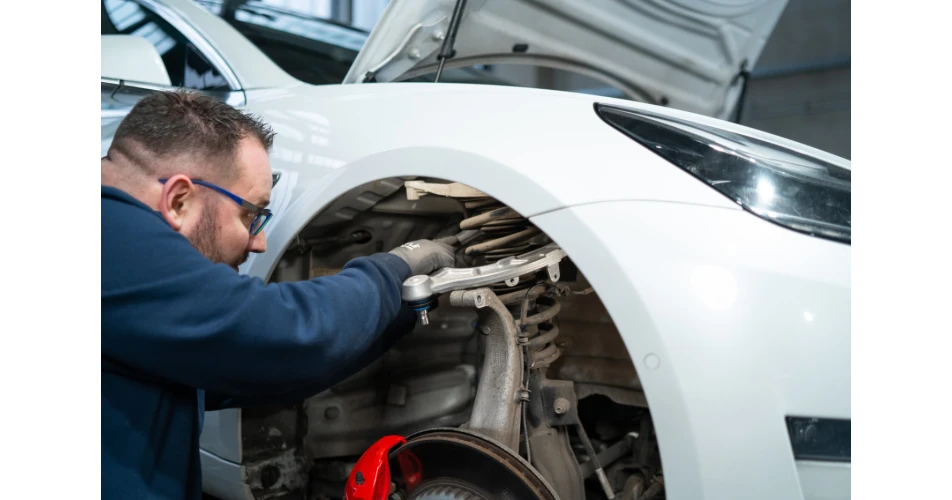 Push the new MEYLE HD control arm into the top mount. Adjustment between the arm and the top mount should be 60mm.
 Push the ball joint in the swivel bearing.
 Tighten all fixings to manufacturer recommended settings: Ball joint screw – 56Nm Bearing control arm – 50Nm Top mount 13mm screw – 35Nm Top mount 15mm screw – 62Nm


-3.jpg)